The most common reason for low-quality prints has to do with a low-quality source file.
To test whether your printer is in good health, print the Sample label.
This label is provided at standard quality and should print clearly.
If it seems like your original low-quality print was designed for an 8.5 x 11 size, check the Platform setup guides to see if you can change the label settings to 4 x 6.
Our recommendation is to use a commercial solution which will automatically download your orders from online channels (eBay, Amazon, and Etsy, etc.) and provide you with a simple button to print high quality 4 x 6 labels.
If only parts of your label look faded, the reason could be one of the following:
-
Label
The darkness of the label depends on the label manufacturer. High quality labels produce darker prints. -
Margins and page size
Please ensure the content takes up the whole label. If there are extra borders, your design may be "shrunk" printed in a smaller size resulting in faded content.
If you are printing 4 x 6 labels, the sample 4 x 6 label should take up the label's full width and height.
- Print density and speed
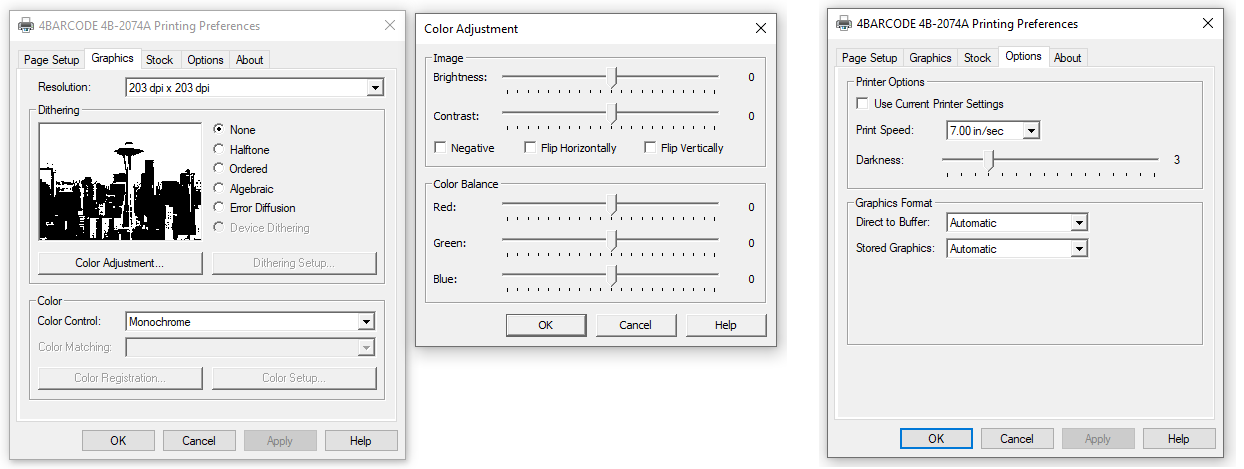
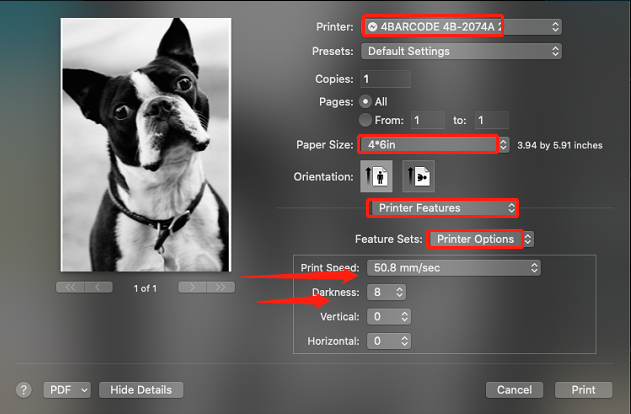
Within your printer preferences, you can set your "Density" and "Speed"
By default, Printer is set to print at its fastest. Slowing this speed will result in a higher resolution.
Note: Increasing the number for your density / darkness will result in a darker print. Setting the density too high will result in unwanted dark lines and/or label getting too hot and sticking mid-way to the printer head. Decreasing this number results in a lighter print.
For Windows:Adjust the print speed to 50.8mm/s or 76mm/s, and adjust the print darkness to 6 or 8.

You may access these settings by going to your Control Panel -> Printers and Devices -> Right Click on Printer -> Printer Preferences -> Settings
For Mac: Adjust the print speed to 50.8mm/s or 76mm/s, and adjust the print darkness to 6 or 8.
Look for drop down menu under "Printer Features".
