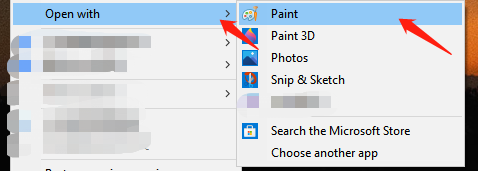
- Open the photo or screenshot with Paint
- Press WIN + P or click on Print to bring up the print window.
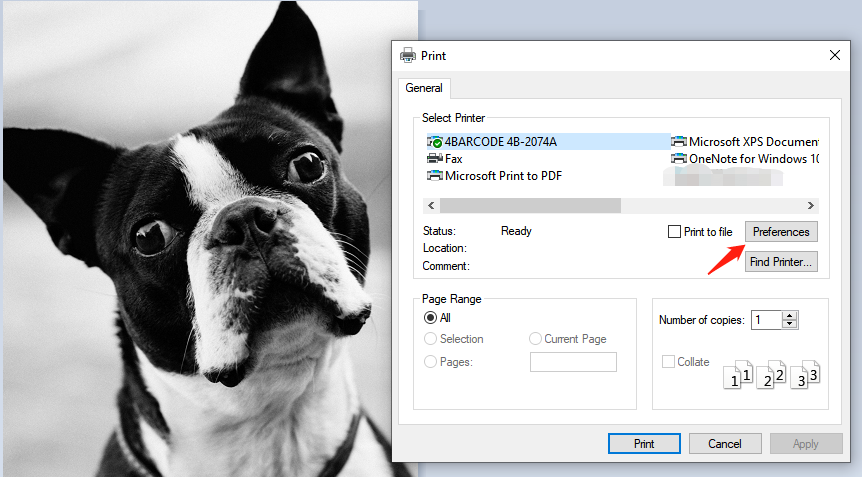
- Click on your printer name and then Preferences.
S8(4BARCODE 4B-2074A), A300(4BARCODE 4B-3044A)
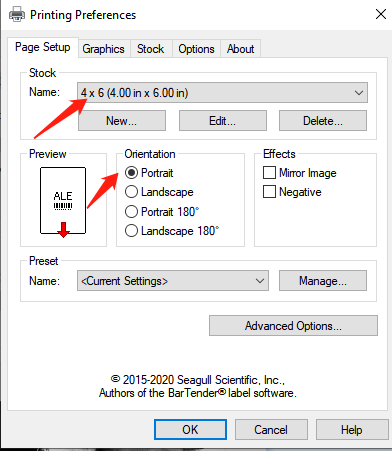
- Choose the right paper size and orientation.
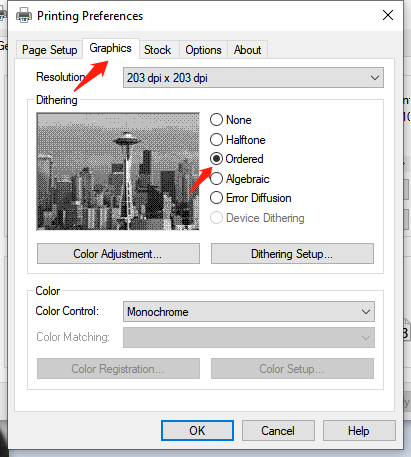
- Go to Graphics,and then change the dithering into Ordered or Halftone.
- Click Ok and then Print
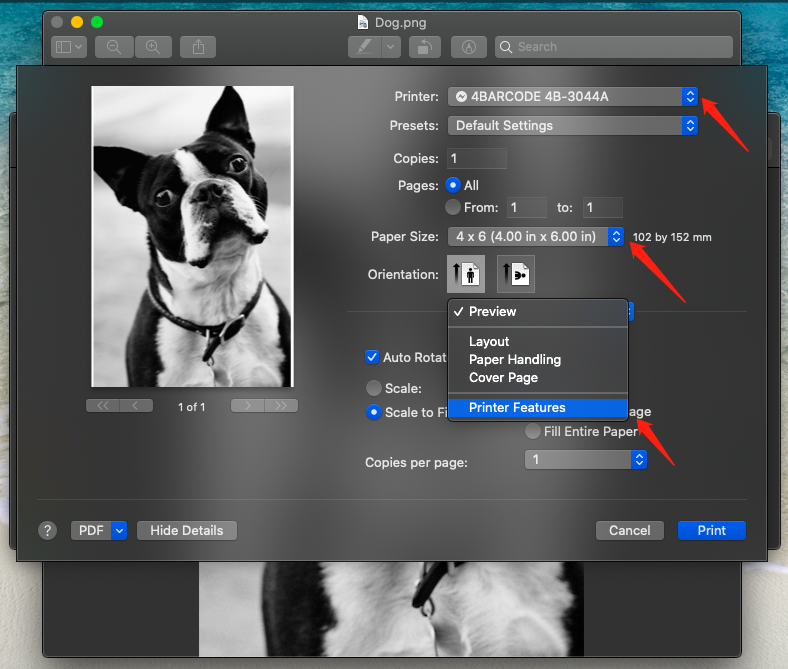
- Press Command + P or click on Print button to bring up the print window.
- Make sure the printer name is correct. S8(4BARCODE 4B-2074A), A300(4BARCODE 4B-3044A)
- Select the right paper size. Here we use 4"×6" as an example.
- Click on Printer Preview from the drop-down menu of Preview
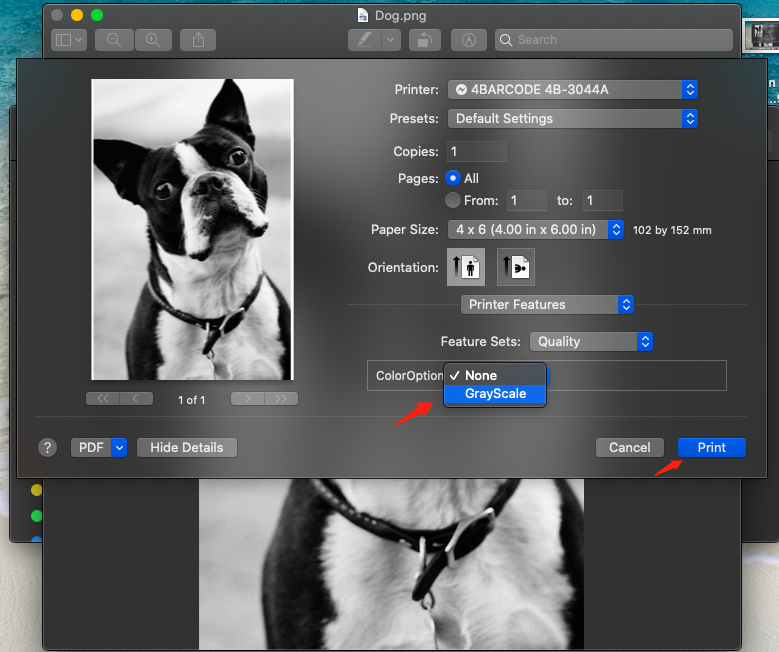
- Select Grayscale from the drop-down menu of the ColorOption.
- Clck on print.