
Set up HotLabel HL-A300
Install the driver for the 300 DPI A300 label printer on Windows or Mac and print your first label.
Before you start
- Connect power and the USB cable in the box, then switch the printer on.
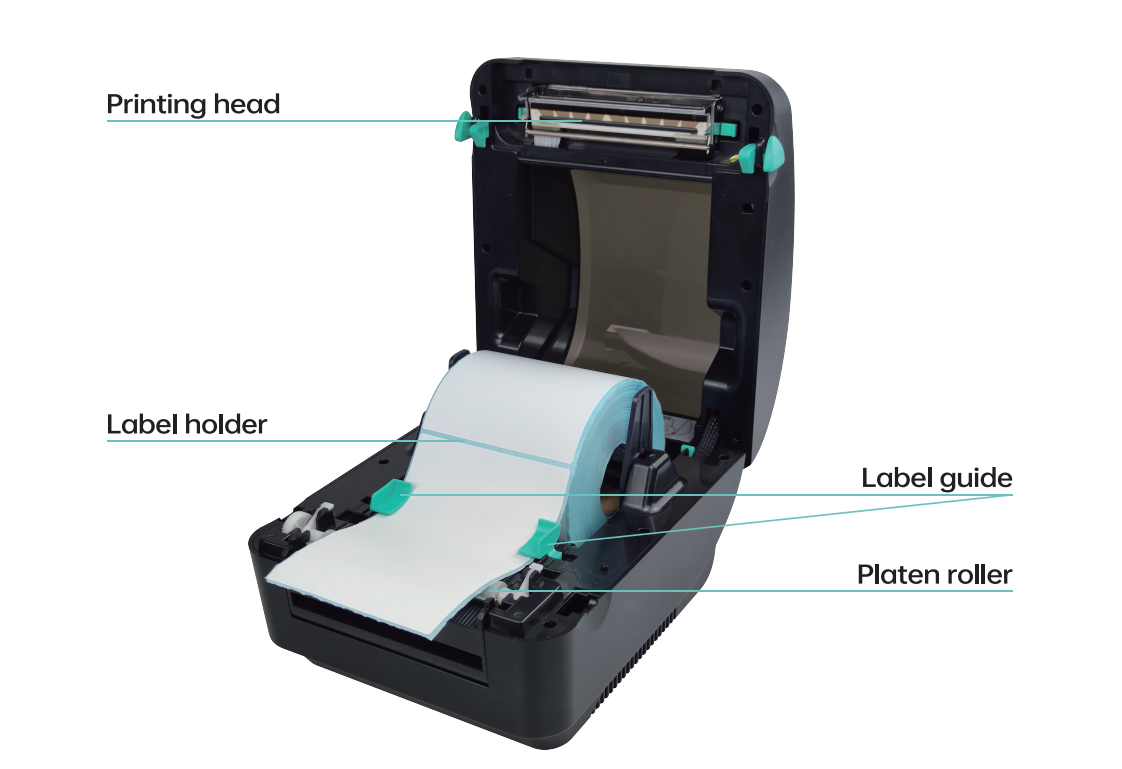
- Load direct-thermal labels printing side up. The first label should stick out past the tear bar; close the lid until it clicks.
Warning
Keep the printer connected and switched on during installation. Use a USB port on the computer itself, not a hub.
Install the driver
Windows 7, 8, 10 and 11.
Download the HotLabel Windows driver (1 MB)
Step 1 — Run the installer
Open the downloaded file. If Windows shows "Windows protected your PC", click More info → Run anyway.
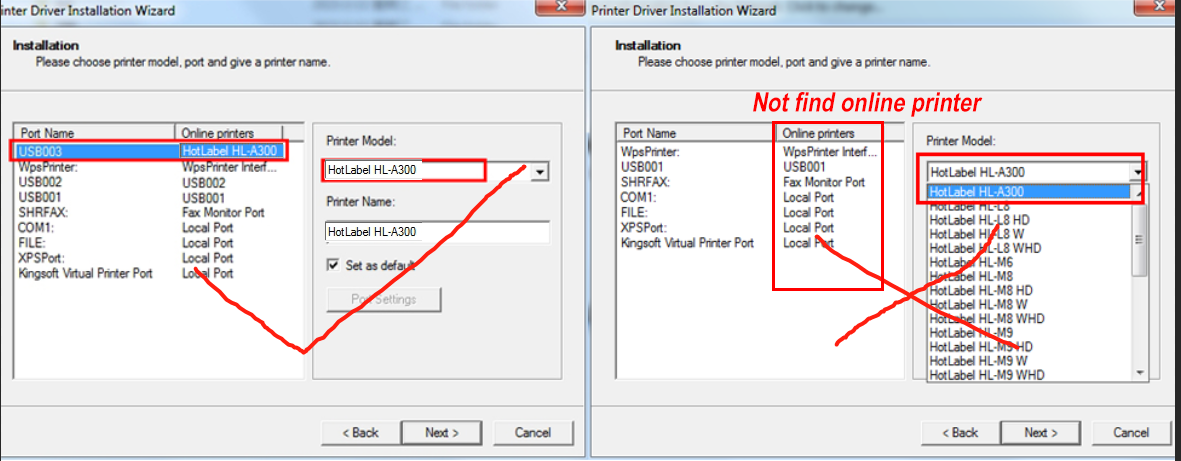
Step 2 — Let the wizard detect the printer
If the wizard can't see the printer, switch the printer off and on again while the wizard is open, then click Refresh.
Step 3 — Finish
HotLabel HL-A300 now appears under Settings → Printers & scanners.
Download the HotLabel Mac driver (0.2 MB)
Step 1 — Open the installer
Double-click the .pkg in Downloads.
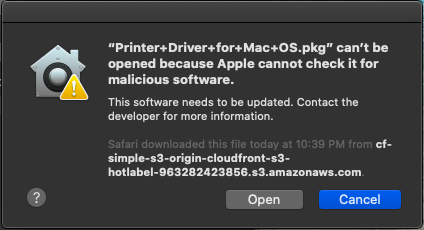
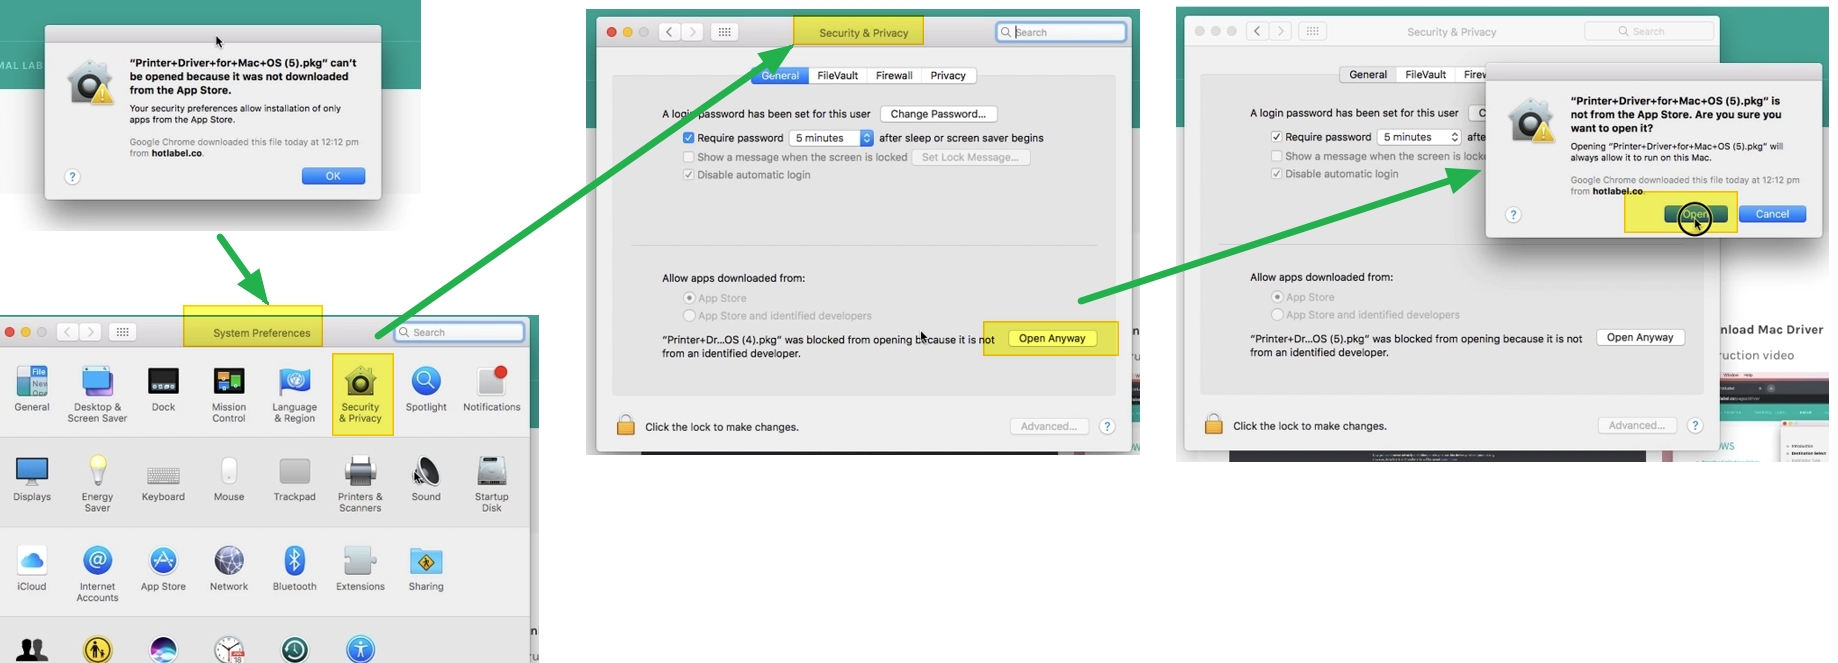
If macOS says the app can't be opened, right-click → Open, or allow it under System Settings → Privacy & Security → Open Anyway. The installer is safe; it is simply not distributed via the App Store.
Step 2 — Add the printer
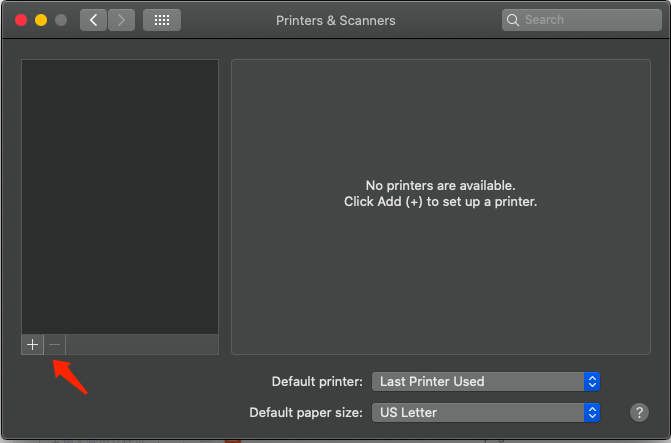
Open System Settings → Printers & Scanners and click Add Printer (+).
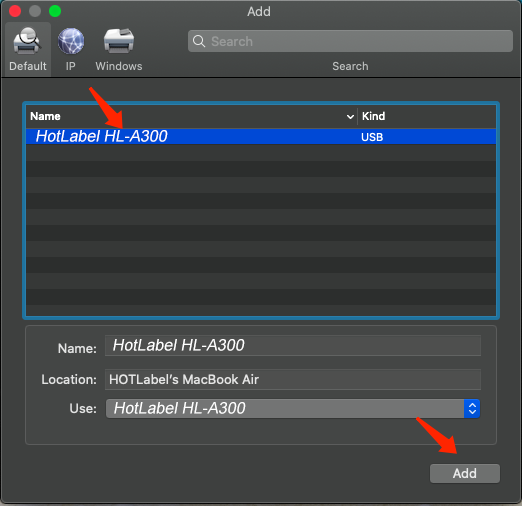
Select HotLabel HL-A300 and click Add.
Step 3 — Set the label size
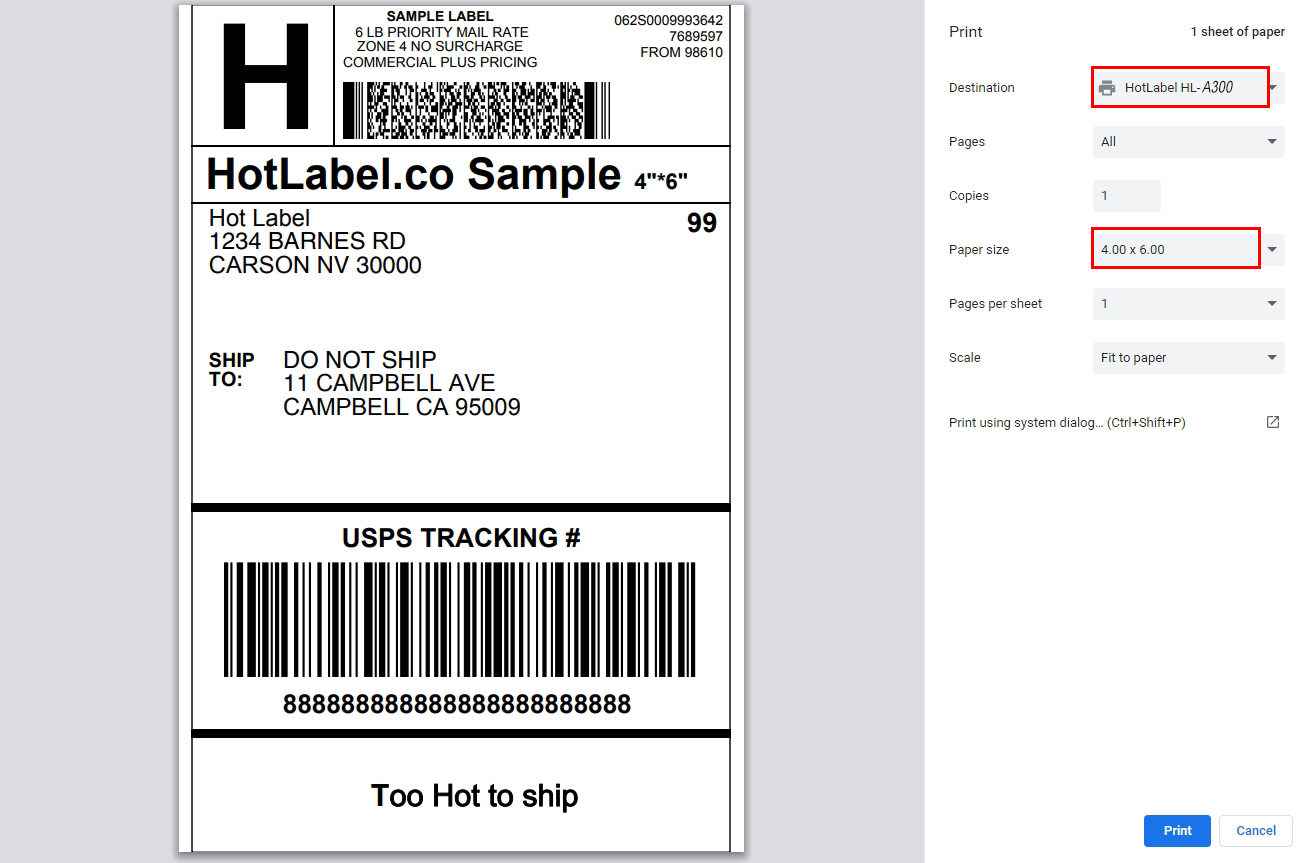
Choose Paper Size → 4 × 6 in in the print dialog, or make it the default.
Use the built-in Zebra-compatible driver — see the Chromebook guide.
Print a test label
- Download the sample 4 × 6 label (PDF)
- Print it with HotLabel HL-A300 selected, paper size 4 × 6 in, scale Fit to page.
Printed correctly?
Set your platform to 4 × 6 labels next: eBay, Shopify, Amazon or see all platforms.