
Set up HotLabel HL-M9 / M9HD
Install the driver for the mini M9 (203 DPI) or M9HD (300 DPI) label printer on Windows or Mac and print a test label.
The HL-M9 and HL-M9HD use the same HotLabel driver as the S8 and M6. The only difference is print resolution — M9HD prints at 300 DPI, so small text and barcodes come out sharper.
Before you start
- Connect the power adapter and the USB cable in the box, then switch the printer on. Macs without USB-A: use the included USB-C adapter.
- Load a roll of direct-thermal labels, printing side up, and pull the first label out past the tear bar. Close the lid until it clicks.
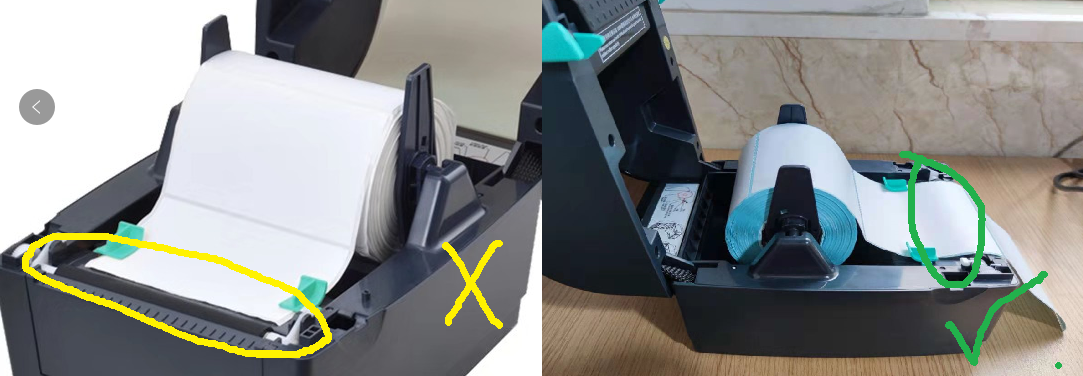
Warning
Keep the printer connected and switched on during the whole installation.
Install the driver
Windows 7, 8, 10 and 11.
Download the HotLabel Windows driver (1 MB)
Step 1 — Run the installer
Open the downloaded file. If Windows shows "Windows protected your PC", click More info → Run anyway.
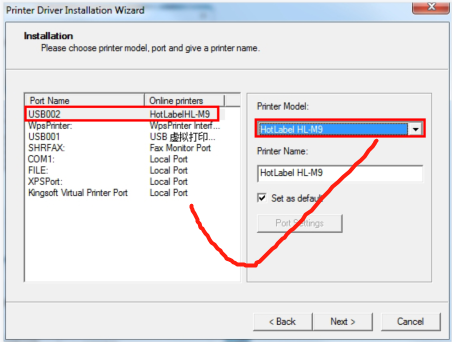
Step 2 — Let the wizard detect the printer
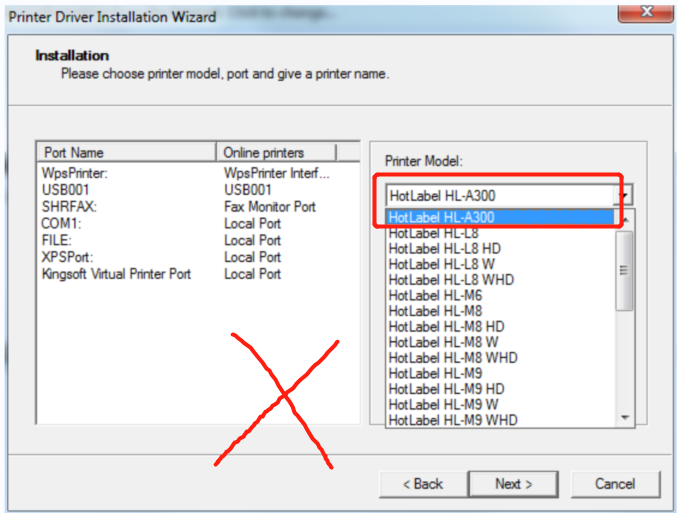
If no printer appears, switch the printer off and on while the wizard is open, then click Refresh.
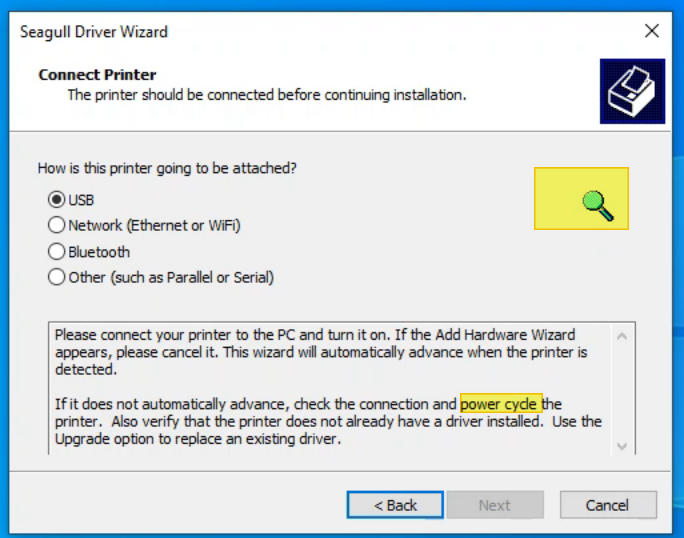
Step 3 — Finish
HotLabel HL-M9 now appears under Settings → Printers & scanners.
Download the HotLabel Mac driver (0.2 MB)
Step 1 — Open the installer
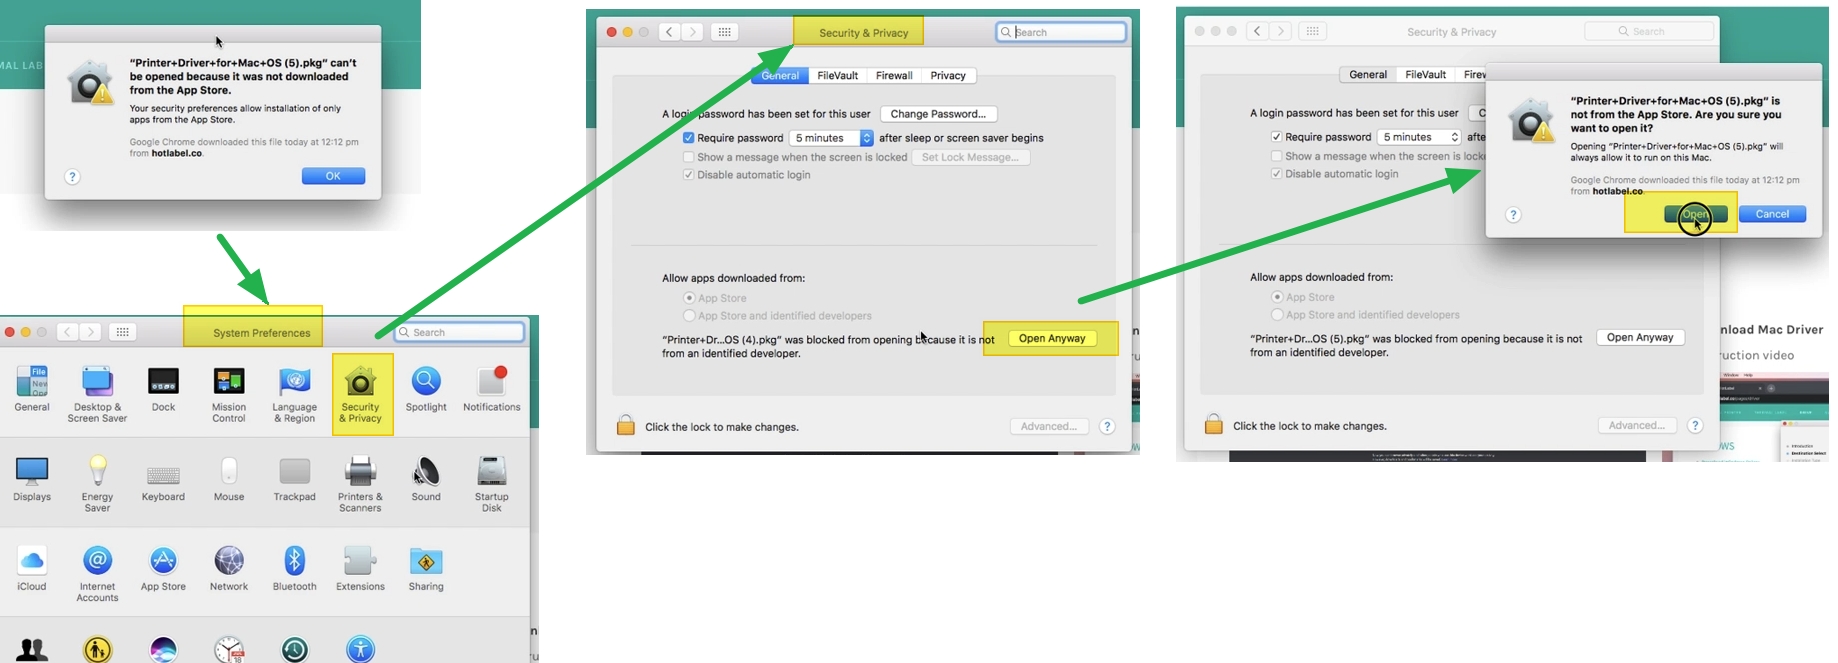
Double-click the .pkg. If macOS blocks it, right-click → Open, or allow it under System Settings → Privacy & Security → Open Anyway. The installer is safe; it is just not distributed via the App Store.
Step 2 — Add the printer
System Settings → Printers & Scanners → Add Printer (+) → select HotLabel HL-M9 → Add.
Step 3 — Set the label size
Choose Paper Size → 4 × 6 in in the print dialog, or make it the default.
Use the built-in Zebra-compatible driver — see the Chromebook guide.
Print a test label
- Download the sample 4 × 6 label (PDF)
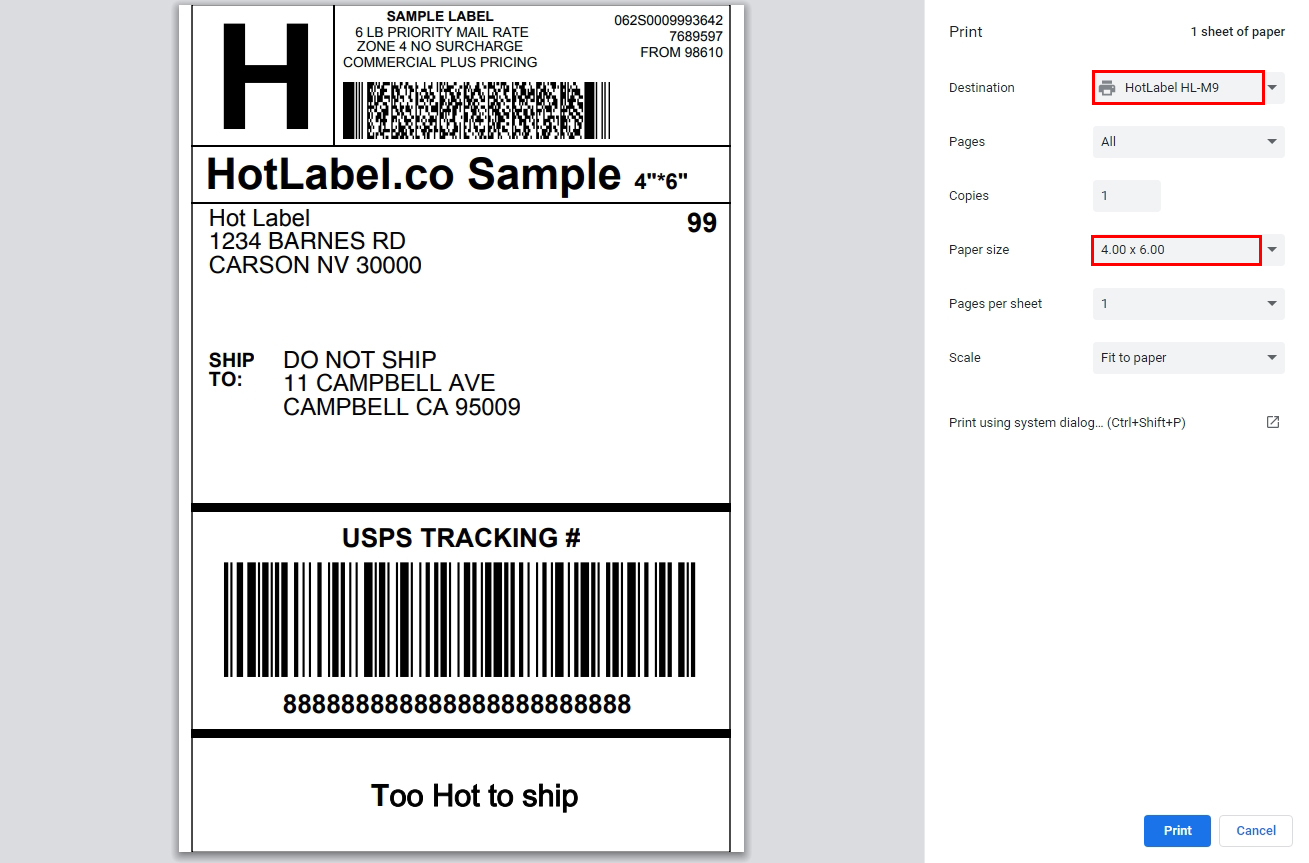
- Print it with HotLabel HL-M9 selected, paper size 4 × 6 in, scale Fit to page.
Printed correctly?
Now set your platform to 4 × 6 labels: eBay, Shopify, Amazon or see all platforms.