
Set up HotLabel HL-S8 / HL-M6
Install the driver and print your first 4 × 6 label on Windows or Mac. For S8 and M6 printers bought after 20 February 2023.
Is this your printer?
This guide is for HL-S8 and HL-M6 printers bought after 20 February 2023. They use the HotLabel driver and show up on your computer as HotLabel HL-S8 or HotLabel HL-M6. Bought earlier, or your printer shows up as 4BARCODE 4B-2074A? Use the older S8 / M6 guide instead. Not sure? See Which model do I have?
Before you start
- Plug in the power adapter and connect the printer to your computer with the USB cable in the box. Switch the printer on.
- Open the lid and drop in a roll of direct-thermal labels, printing side facing up. Pull the first label out so it sticks out past the tear bar, then close the lid firmly until it clicks.
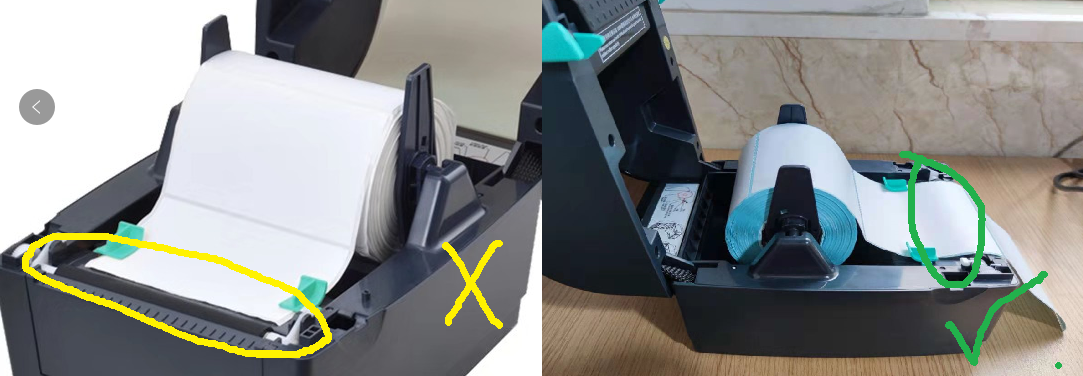
Two things that cause most install problems
- The printer must be connected and switched on before you run the installer.
- Use a USB port directly on the computer, not a hub. If the wizard can't see the printer, try another port and cable.
Install the driver
Works on Windows 7, 8, 10 and 11.
Download the HotLabel Windows driver (1 MB)
Step 1 — Run the installer
Open the downloaded file and follow the wizard. If Windows shows a "Windows protected your PC" prompt, click More info → Run anyway.
Step 2 — Let the wizard find your printer
The wizard searches for a USB printer. If nothing appears, switch the printer off and on again while the wizard is open, then click Refresh.
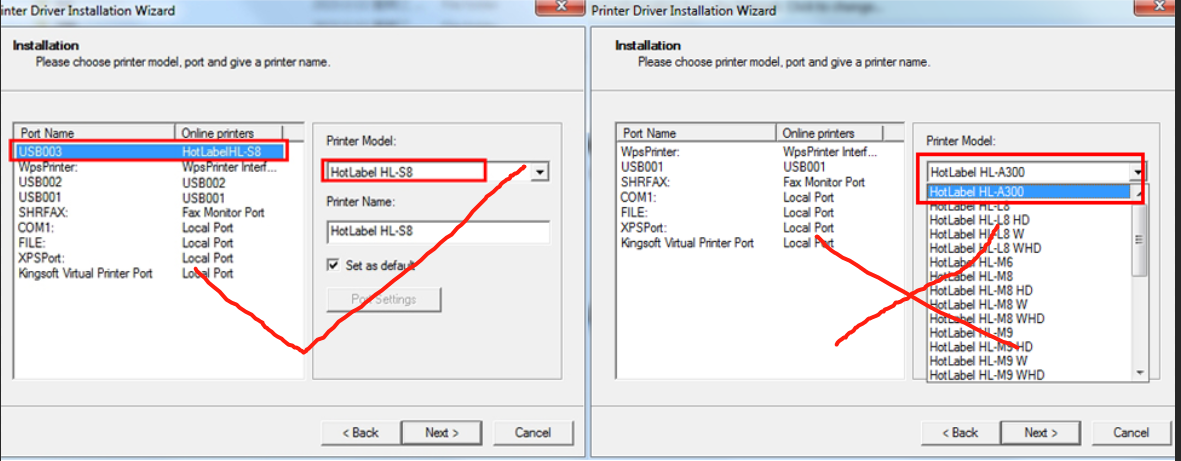
Step 3 — Finish
When the wizard completes you will see HotLabel HL-S8 (or HL-M6) under Settings → Bluetooth & devices → Printers & scanners.
Works on macOS 10.13 and later, including Apple-silicon Macs. Use the USB-C adapter in the box if your Mac has no USB-A port.
Download the HotLabel Mac driver (0.2 MB)
Step 1 — Open the installer
Double-click the downloaded .pkg file. If macOS says the app is from an unidentified developer, right-click the file and choose Open, or go to System Settings → Privacy & Security and click Open Anyway. The installer is safe; it is simply not distributed through the App Store.
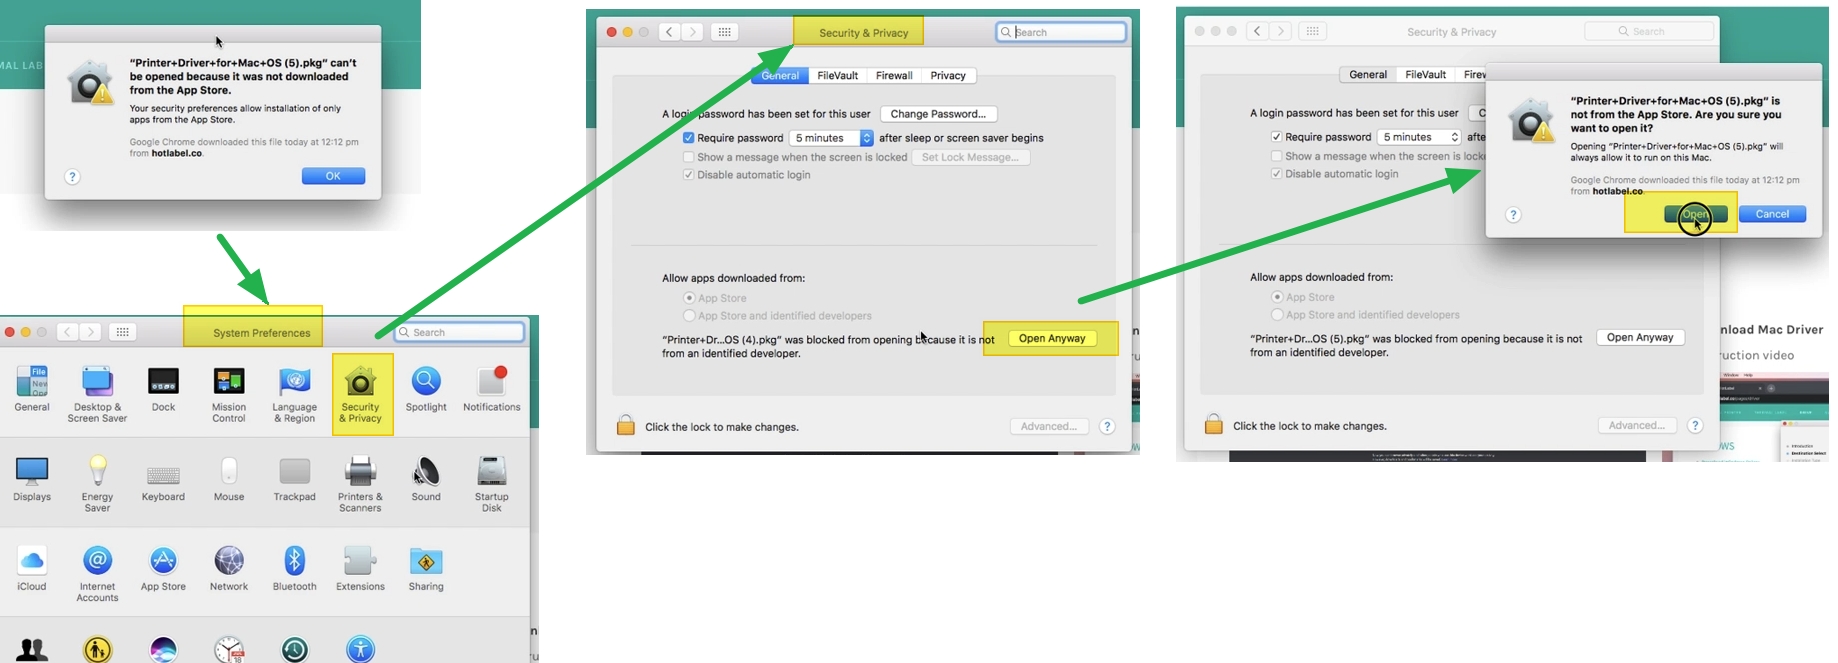
Step 2 — Add the printer
Go to System Settings → Printers & Scanners, click Add Printer (+), select HotLabel HL-S8 / HL-M6 in the list and click Add.
Step 3 — Set the label size
In any print dialog choose Paper Size → 4 × 6 in (or your label size). You can make it the default so you don't have to pick it every time.
Chromebooks cannot run third-party installers, but you can print with the built-in Zebra-compatible driver. Follow the Chromebook setup guide.
See the Linux setup guide.
Print a test label
- Download the sample 4 × 6 label (PDF)
- Open it in your browser or PDF viewer and press Ctrl+P (Windows) or ⌘+P (Mac).
- Choose HotLabel HL-S8 / HL-M6 as the printer, paper size 4 × 6 in, scale Fit to page / Default, then print.
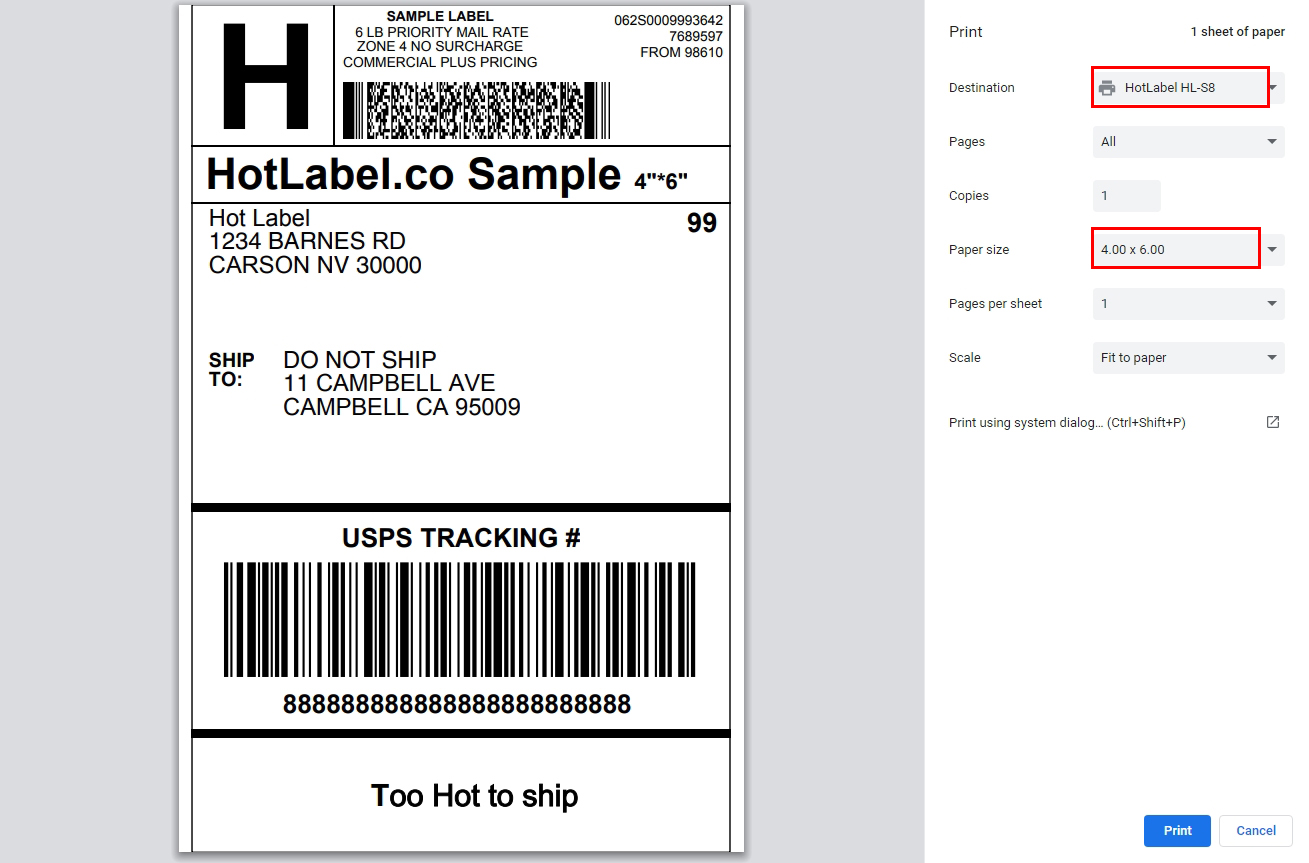
It printed? You're done.
Next, set your selling or shipping platform to output 4 × 6 labels: eBay, Shopify, Amazon, Australia Post & others.
Having trouble?
- Wizard can't find the printer, or the printer isn't listed afterwards → Windows: printer not detected · Mac: printer not showing
- Label prints tiny, sideways or cut off → Label too small, sideways or cut off
- Red or flashing light → Red light
- Nothing prints, blank labels → Blank labels